So I went out and got one of those commercial solar charged packs. It looked like a good deal. Got it all setup and charged and even got to use it once when the power was out for a couple hours. I tried to use it a few days later and the entire thing was dead. Would not do anything at all… Returned it to the store where I had purchased it and got my $327.97 back…
I decided it was time to do some research and to see if I could make my own version of that power pack. This project cost me about $300 and I got more than 4 times more Watt hours and a bigger solar panel. So it was cheaper and runs longer than the commercial one I had to return.
What I used:
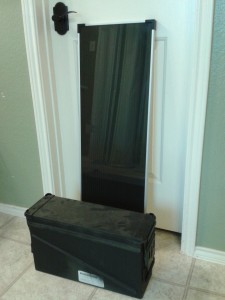
1 – 40mm grenade ammo can (local surplus store)
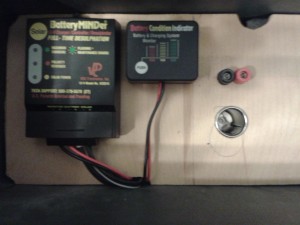
1 – Solar charging kit (bought online) Included a 15 watt solar panel, a charge controller and a battery status indicator.
4 – 7-Watt hr 12 volt sealed lead acid batteries (you can use a bigger size just make sure they will fit with enough space in between for the other connectors that are needed)
1 – 12 volt cigarette lighter socket
1 – set of low voltage banana plugs. (the red and black ones for things like speakers)
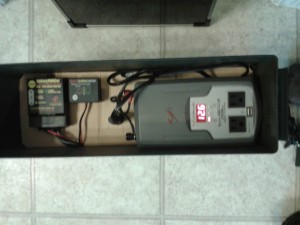
1 – 750 Watt inverter with USB outlets as well as 120 volt AC power
1 – Thin plywood sheet just big enough to fit in the ammo can.
Miscellaneous electrical connectors
Enough cardboard to line the inside of the ammo can.
A few feet of 12 gauge stranded wire (not the single strand stuff used in home electrical wiring)
When selecting your batteries, you can use any size you want as long as you remember part of the point here is a PORTABLE power pack. These batteries can get pretty heavy so keep that in mind when you are getting what you want. I chose the 7 watt hour batteries because I was able to fit 4 of them in a single layer in the bottom of my ammo can… and I was able to get them really cheap.
Step 1:
Cut the cardboard so that you can cover the bottom and all 4 sides of the ammo can about 1 inch taller than the height of the batteries.
Step 2:
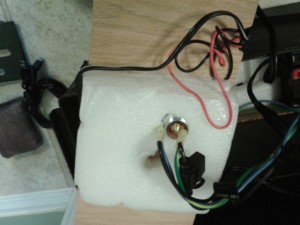
Place the batteries inside the cardboard liner so that they are in the corners. Fill the remaining space with foam or some other good non-conductive filler. I used the foam packing material that came in the solar panel kit. Cut the foam so it’s the same height as the cardboard you used in Step 1.
At this point your batteries should be pretty much locked into place and should not be able to slide around in the case.
Step 3:
Cut the plywood just small enough so that it will fit down in the ammo can on top of the batteries. You will need to drill 1 hole near the center big enough to insert the 12 volt outlet ensuring that it will fit in the space between the batteries. 2 more small holes drilled for the banana plug sockets. Cut a notch on one of the long sides so you have a gap between the side of the ammo can to feed through the wires from that charge controller. Insert and attach the 12 volt socket and the set of red and black banana plug sockets.
Step 4:
When connecting the batteries together, make sure you wire them in parallel not in series. A parallel connection will give you 12 volts out with a longer charge, a series connection will give you 48 volts and a dead inverter… Parallel means all the positive (+) terminals are together and all of the negative (-) terminals are together. Cut your wires to a length that leaves very little slack. We don’t want a bunch of extra wire in there… Be careful when making the wiring connections to make sure you only connect the (+) connections to other (+) connections and likewise for the (-) connections. All 4 (+) lines from the batteries as well as the (+) output lead from the charge controller need to connect together to a single lead that will connect to the (+) connector of the 12 volt socket. All 4 (-) lines from the batteries as well as the (-) output lead from the charge controller need to connect together to a single lead that will connect to the (-) connector of the 12 volt socket. The input leads to the charge controller connect to the red and black banana plug sockets. Red is (+) Black is (-). You will need to cut a hole down into the foam so that your 12 volt socket and your wires fit down inside. Once everything is connected it’s time to place the plywood with all of the attachments down over the batteries.
Step 5:
Attach the red and black banana plug male connectors to the wires from the solar panel.
Now you should have a solar charged power system. I would recommend letting it sit out in the sun for at least a day to make sure you get a full charge. The cord that came with the solar panel is long enough that you should have no trouble with keeping the battery case out of the sun.


