 So you would like to have a greenhouse but you don’t have an extra $2000-$3000 laying around anywhere…? Me too! Here’s a way to make your own for under $300.
I wasn’t thinking about making this an article when I made it so there are some steps I don’t have pictures for but you should be able to see enough details in the images to figure out what I’m talking about.
Supplies needed:
Schedule 40 PVC pipe. 10 foot lengths are easiest to work with. Amount depends on how large you want to make your hoophouse.
Schedule 40 PVC 4-way connectors. Number once again depends on size/depth of hoophouse.
Schedule 40 PVC 3-way connectors. 2 needed, one for each end of the hoophouse.
3/8″ x 48″ rebar. One for each “leg”. These are the attach point for the hoophouse legs.
Plastic sheeting. Make sure you get enough to cover the entire thing including the ends.
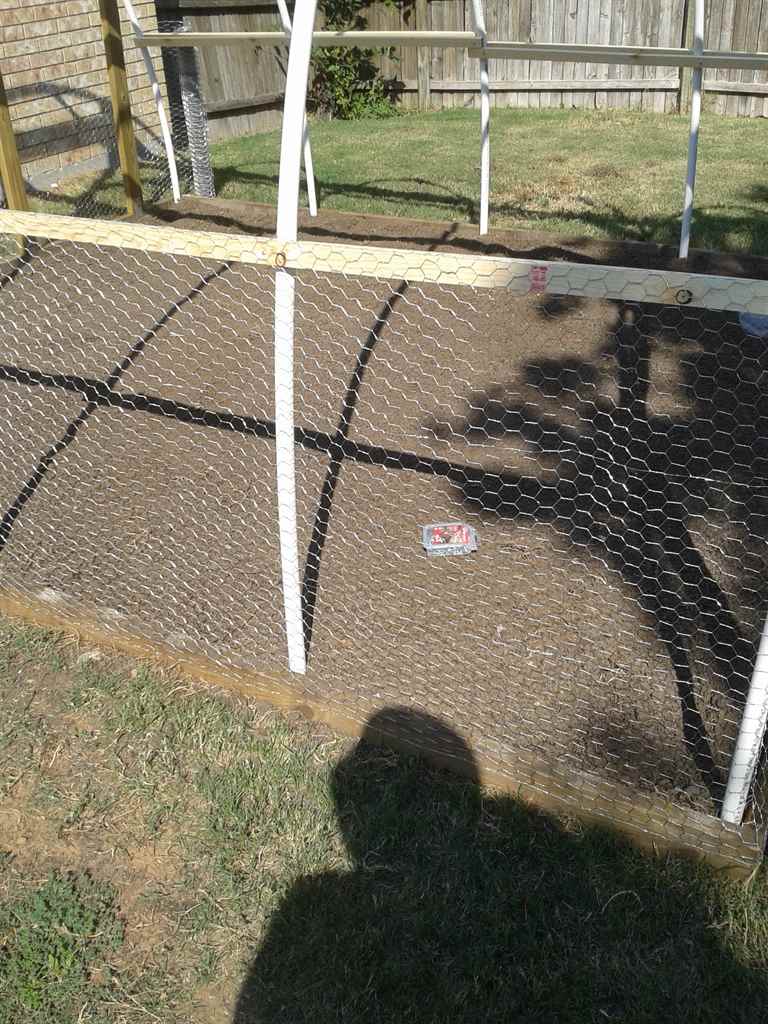
10 – 2x4x96 pressure treated lumber. These are for the ends of the hoophouse.
Enough 2×4 or 2×6 pressure treated lumber to make the “ground frame” so that depends on how big your hoophouse is going to be. Mine is 10’x12′ so I used 2×10′ and 2×12′ for my frame. I used 2×6 and recessed them about 1/2 way below ground.
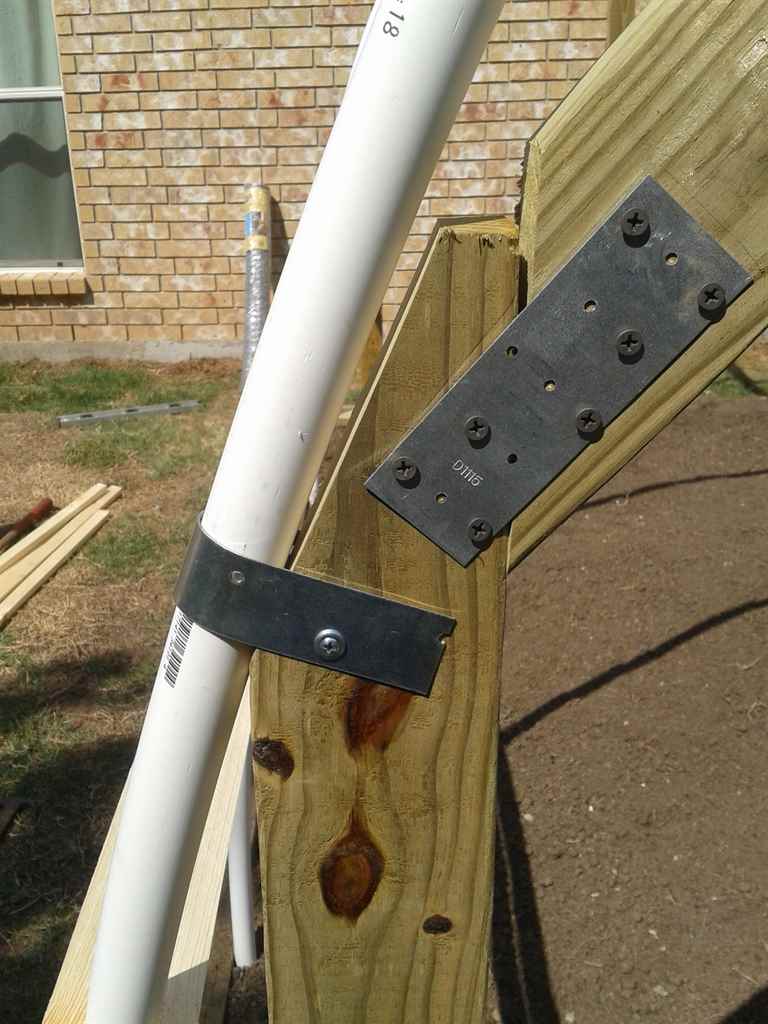
Some type of strapping material to attach the hoops to the front and back frames. I used steel straps with predrilled holes. Found in the fencing department of the local bigbox hardware place…
Nails or decking screws.
Step 1:
Mark your desired size on the ground. Make sure it’s squared. Remove the sod. Trust me on this one… I didn’t remove the sod and just turned it all with a shovel and I am still dealing with grass trying to grow in the greenhouse.
Step 2:
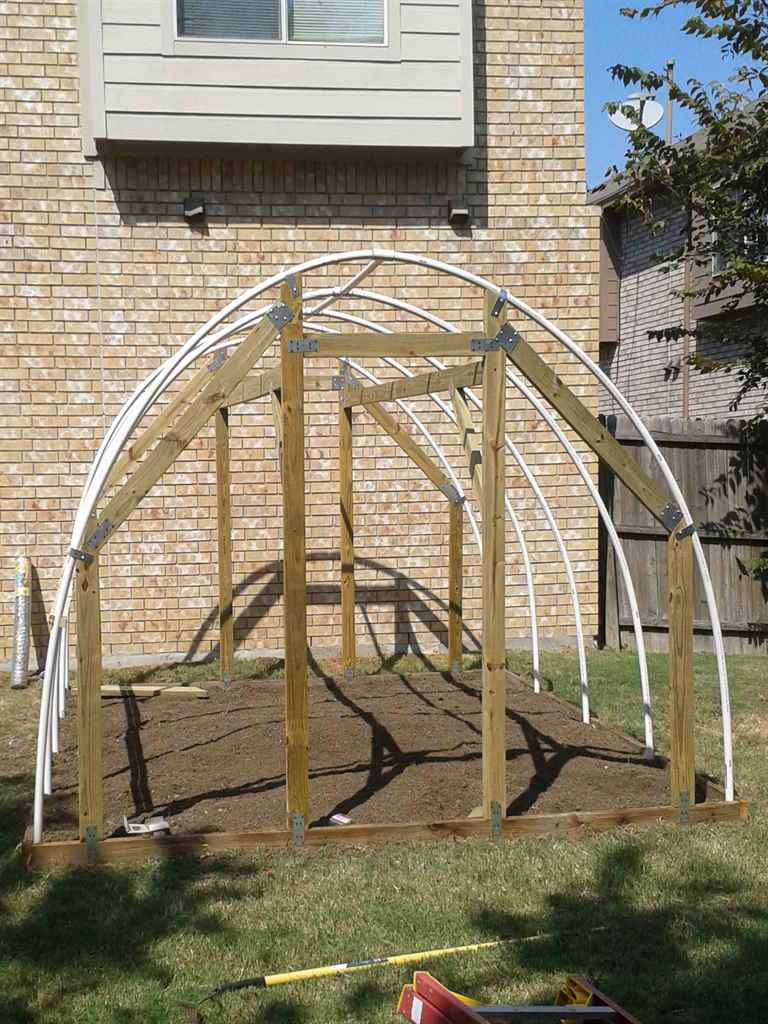
Build the ground frame to what ever size you want it to be. 10 feet wide is a good size to start with. 10 foot PVC pipes on a 10 foot wide house will give you a height of just under 8 feet in the center.
Step 3:
Measure and cut pieces of the PVC pipe to make the top rib of the hoop. The length of these will depend on the length you decided to make your house. Mine were 30 inches each.

Next, layout the top rib pieces on a flat surface and glue them together. the 3 way PVC connectors go on the ends.
you should have something that looks like this when you are done |—|—|—|—| Let that dry for at least 30 minutes. Now it’s time to attach the rest of the ribs and let them dry for at least 30 minutes.
Step 4:
Drive a piece of rebar into the ground at the same distance apart as your top PVC connectors are spaced. Mine are 30 inches apart all the way around. You will probably want somebody to help with the next part. take each of the ribs on one side of your hoop frame and stick them down over the exposed rebar. once you have one side done, you have to grab the other side and bend it to get to the rebar on the other side of your ground frame.
Step 5:
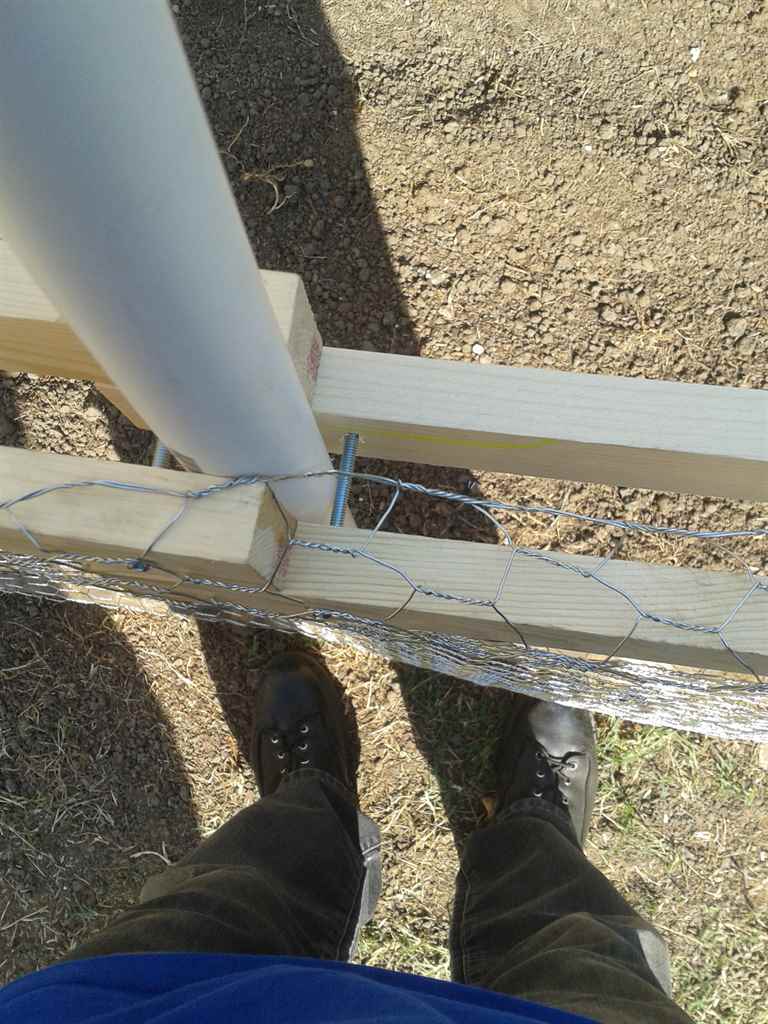
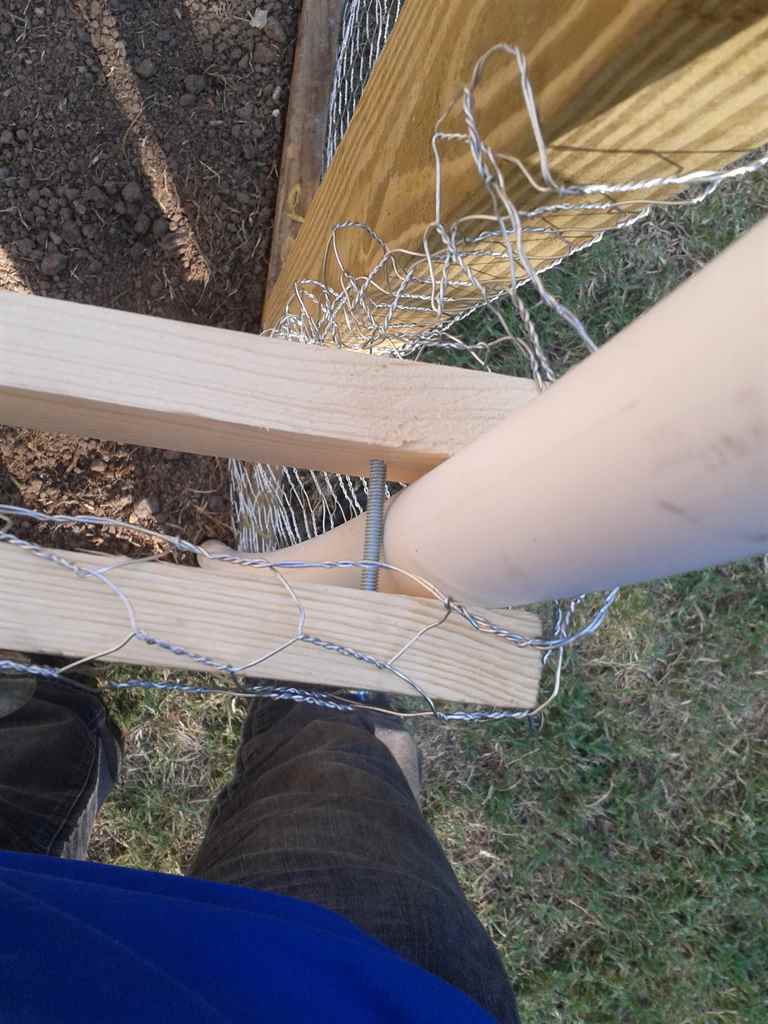
Front and back frames. I built my frames in place to fit the shape of the hoop frame. You just need to make sure that you attach the front and back frames to the ground frame and make them tall enough to be close to the hoop so you have a good attach point all the way around. the left image shows the general layout of the frame and the right image shows how to attach the frame to the hoop.
Step 6:
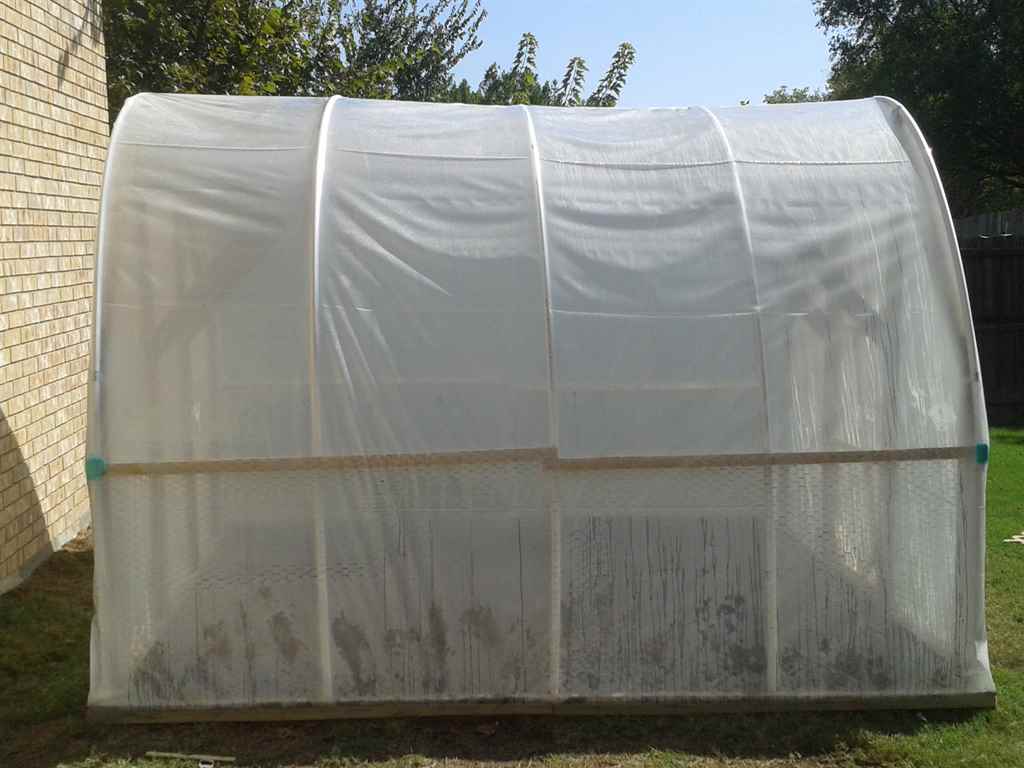
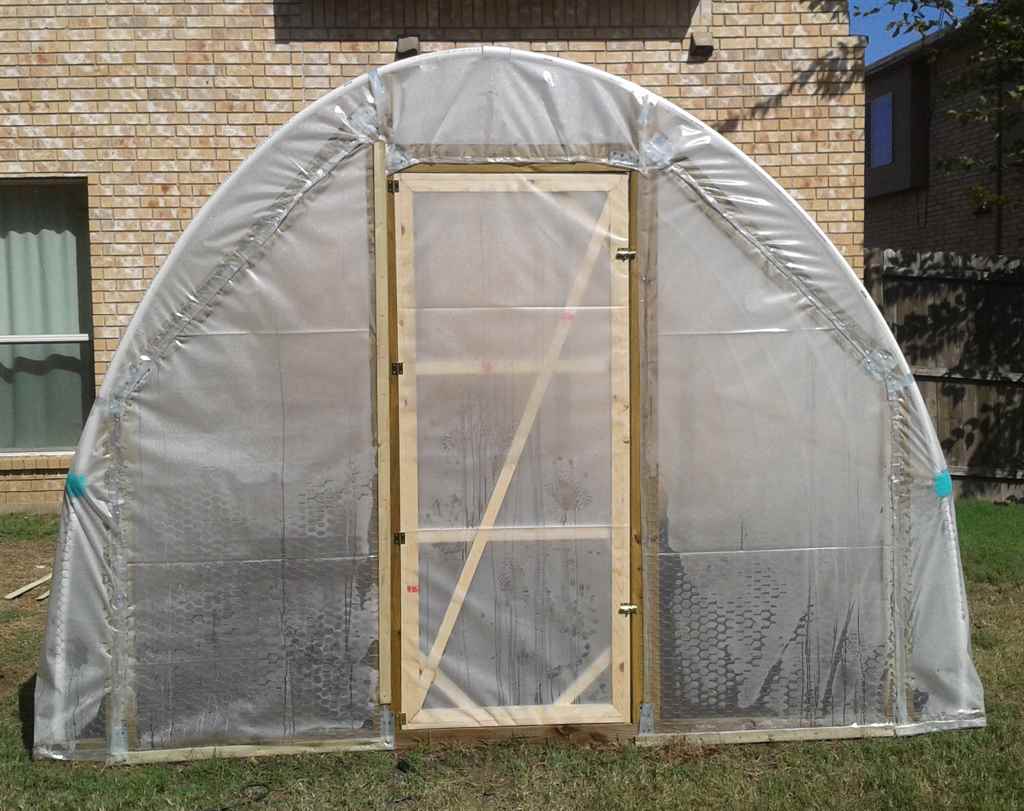
Once you have the frame complete all that is left is to cover the entire thing with the plastic sheeting. I used a heavy duty stapler to stretch it over the frame and then tacked firing strips over the edges to prevent the staples from tearing through the plastic.
You can see in the pictures I also have chickenwire around the bottom. This is to keep the dogs, rabbits or armadillos out in the event that they tear the plastic. The door is made out of 1×2 pine and made to fit the space in the frame.